Part 3: Understanding Tonal Contrast
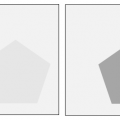
18% Gray
Understanding exposure metering is the final part of the series of articles on photographic exposure. Almost all cameras have automatic exposure these days and those meters perform pretty well. While that is a convenience and a blessing, it is very important to know manual exposure metering if you want to improve your photography skills. In all cameras that allow changing aperture and shutter speed, there is a scale with a pointer visible in the viewfinder. As you change aperture and shutter speed the pointer moves to tell you if the setting will result in correct exposure, over exposure or under exposure.
Suppose you are taking a picture of a black wall. The meter does not know what you are photographing yet it has to come up with an aperture that will result in correct exposure.
The correct exposure depends on the calibration of the meter and a camera’s is calibrated to recommend an exposure that will result in mid-grey tone, specifically a 18% gray tone. This means you will overexpose the black wall by several stops if you follow the meter blindly, resulting in a grey wall instead of a black wall. If you are photographing a white wall and follow the meter, you will underexpose to produce the same grey wall. This is because the black wall reflects less light and the white wall reflects more light and the reflected light meter compensates for either situation.
You have two choices:
- Manually override the exposure although the meter will indicate that is incorrect
- Use an incident light meter
You can use an 18% gray card for the first option, by simply pointing the camera at the card and using the same exposure setting to photograph the wall. It is important to make sure the quality of light on the wall and on the card is same.
As for the second choice, an incident light meter is a gadget that does not care for the reflective qualities of any object and is capable of measuring ambient light.
Since most people don’t carry either (which is a shame since at least the grey card is inexpensive), we want to have a better understanding of the metering modes in present day SLR cameras.
Metering Modes
Matrix metering
In this mode the exposure meter senses the light from numerous segments in the frame. Each segment is metered individually and an average is computed to produce the final exposure. In earlier days of matrix metering, the number of segments used to be several but these days it could be numerous that thereby increasing the chance of getting the exposure correct. Some cameras take this a step further to compare the light and shade pattern of the segments to match a pattern out of many in an in-built database of typical lighting situations to come up with the most optimum exposure. Matrix metering works well in most outdoor situations and it is the most commonly used mode when auto exposure. Matrix metering was perfect for the shot of the lady at Rockefeller Plaza, New York City.
Center Weighted
In this mode more importance is given to a band along the center of the frame. If the area that needs to be properly exposed is in this band, then center- weighted band will give good results. I find that I use this mode rarely.
Spot
Imagine the band in the center weighted system is shrunk to occupy a small spot and that would be the spot metering mode. In this mode, the camera ignores the brightness level of anything else other than this small area. The exposure will be correct exposure for this spot calibrated to 18% grey. These days, cameras can have several such spots in and around the center of the frame, with the ability to select which specific spot one you want. In earlier days, there used to be only one spot at the center, which most likely would not coincide with what you want to meter. So you metered manually and re-framed or used auto exposure lock and re-frame before shooting. A greater number of spots increases the changes that you might get away without using auto exposure lock. Instead of metering the center and re-framing, just the pick the spot which falls on the area to be metered. But there will be situations, when these will not coincide and you will have to resort to manual metering. Such as in the case of the boy blowing bubbles at Washington Square Park, New York City, where I had to manually spot meter the face.


